You have made changes to your site but you don't see the modification when checking the frontend of your site?
You have probably a cache problem, in this article we will explain how to clear your browser, server and plugin cache.
If you have a WordPress site you want to have a caching solution to improve your site performance.
Managed WordPress hosting providers like Kinsta run their own caching solutions, so that you don’t have to install a caching plugin.
The other solution is to use caching plugin like W3 Total Cache or WP Super Cache.
Let’s get started and see how to clear cache for your browser, plugin and server.
1. Clear your browser cache
First, you need to clear your web browser cache. Web browsers store static content like images, stylesheets, JavaScript etc from a website to make your subsequent visits faster.
The problem is that sometimes web browsers fail to realize that a web page has changed. Instead of fetching a fresh copy, they may still reload the page from the cached version store on your computer.
Using Google Chrome
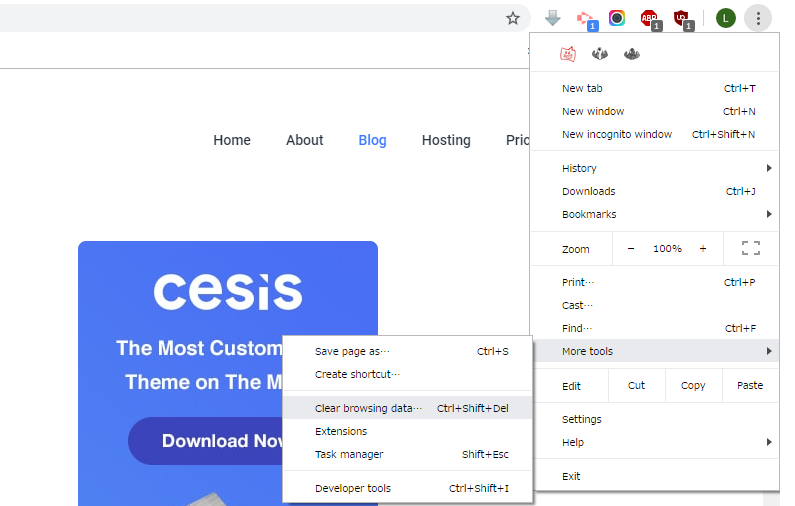
- Click the 3 dots on the top right of the browser
- Go to More tools > Clear browsing data.
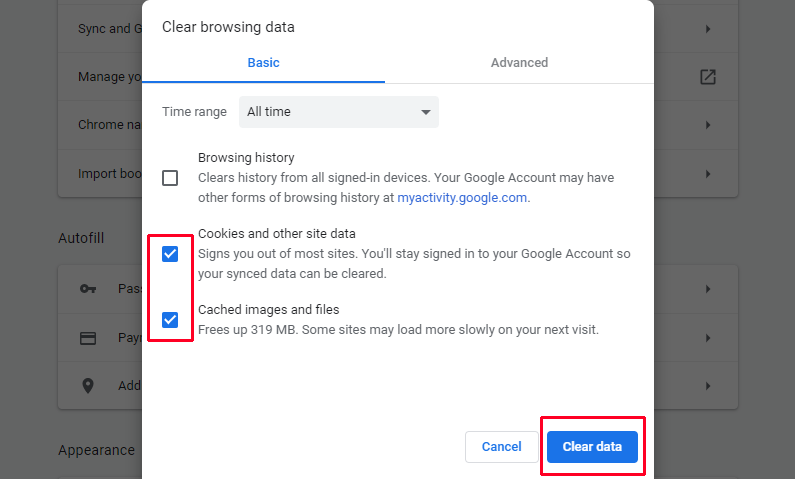
- Set the Time range to All times.
- Set the Time range to All times.
- Select :
- Cookies and other sites data
- Cached images and files
- Click Clear data.
Using Firefox
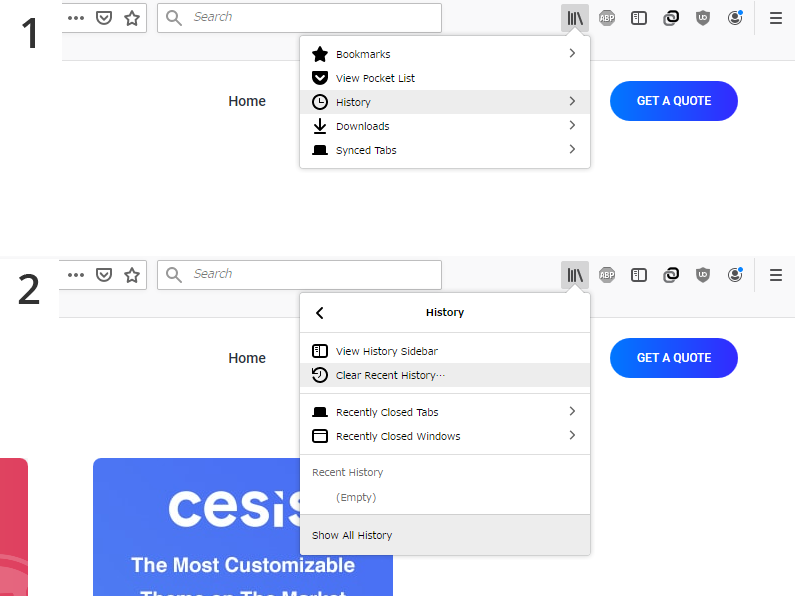
- From the History menu, select Clear Recent History
- From the Time range to clear: drop-down menu, select Everything.
- Then check the Cookies and Cache boxes.
- Click Clear now
To Clear only one page.
If you need to clear the cache of only one of your pages then you can do an hard refresh of the page.
On Windows : Hold down Ctrl and press F5.
On Mac/iOs : hold down ⌘ Cmd and ⇧ Shift key and then press R.
2. Clear Cache of Your WordPress Caching Plugin
If you are using a WordPress caching plugin on your site, then you need to also clear your plugin cache. Most caching plugins allow you to easily do that from their settings page.
Clear Cache in W3 Total Cache
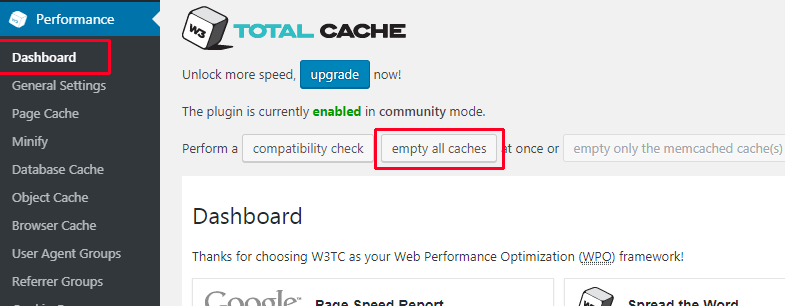
If using W3 Total Cache ( one of the most popular WordPress caching plugin ) head over to Performance » Dashboard page and click on “empty all caches” button.
This will remove all the cache of W3 Total Cache, if you still don’t see the modification then try to also clear the browser cache.
Clear Cache in WP Super Cache
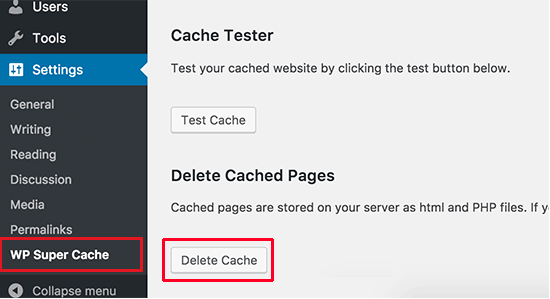
If using WP Super Cache ( an other well known WordPress caching plugin ) head over to Settings » WP Super Cache page and click on “Delete Cache” button.
This delete all the cache of WP Super cache, after deleting the cache if you still don’t see the modification you made try to also clear the browser cache.
3. Clear Cache on Managed Hosting ( Kinsta / WPengine )
Clear Cache with Kinsta
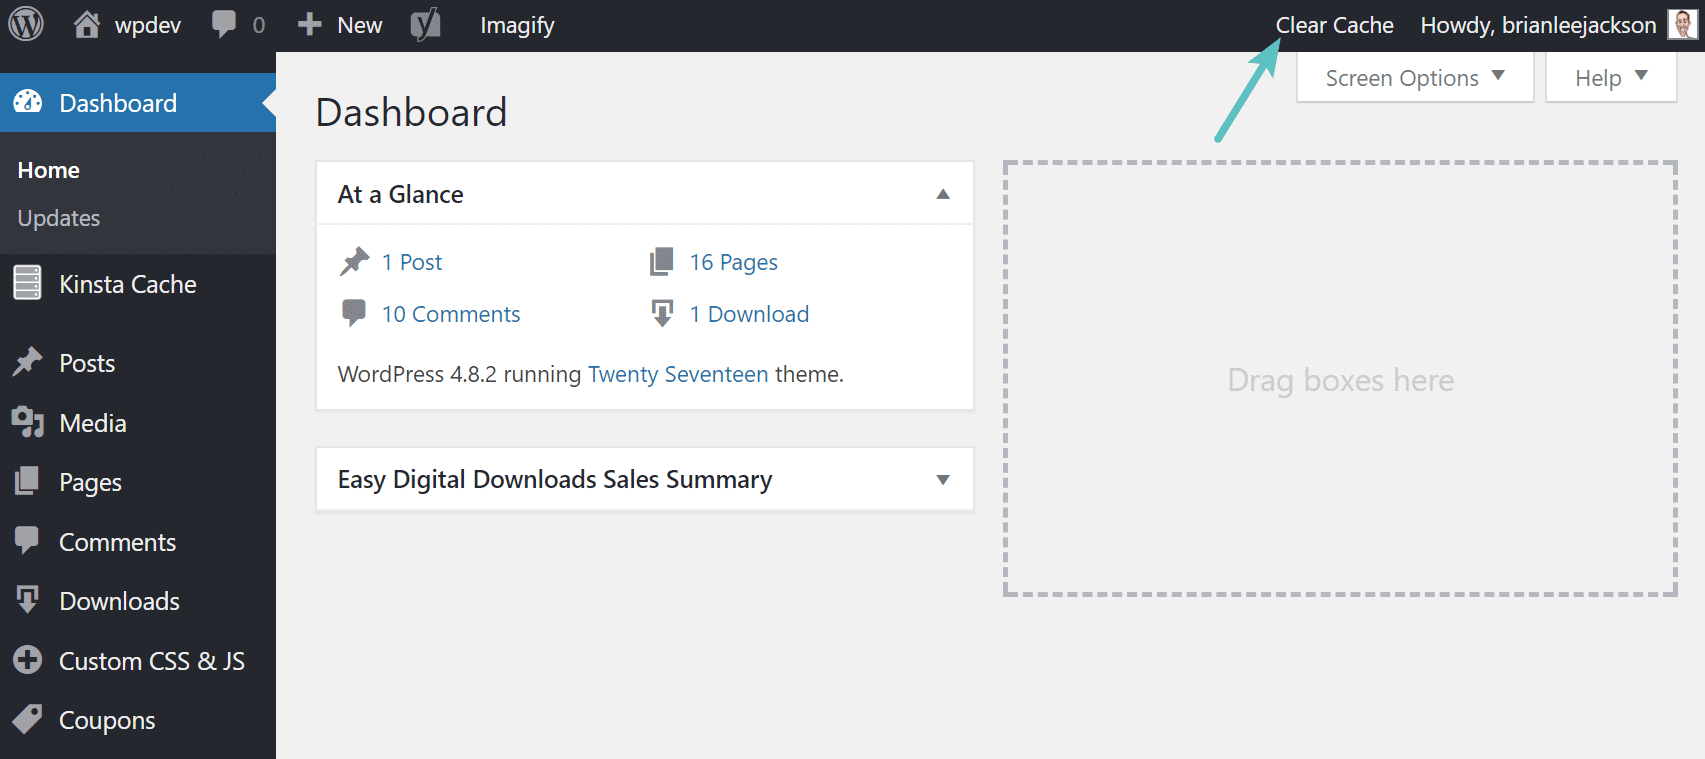
With Kinsta when logged in the WordPress dashboard, from the right from the admin bar. You can clear the cache by clicking “Clear cache“.
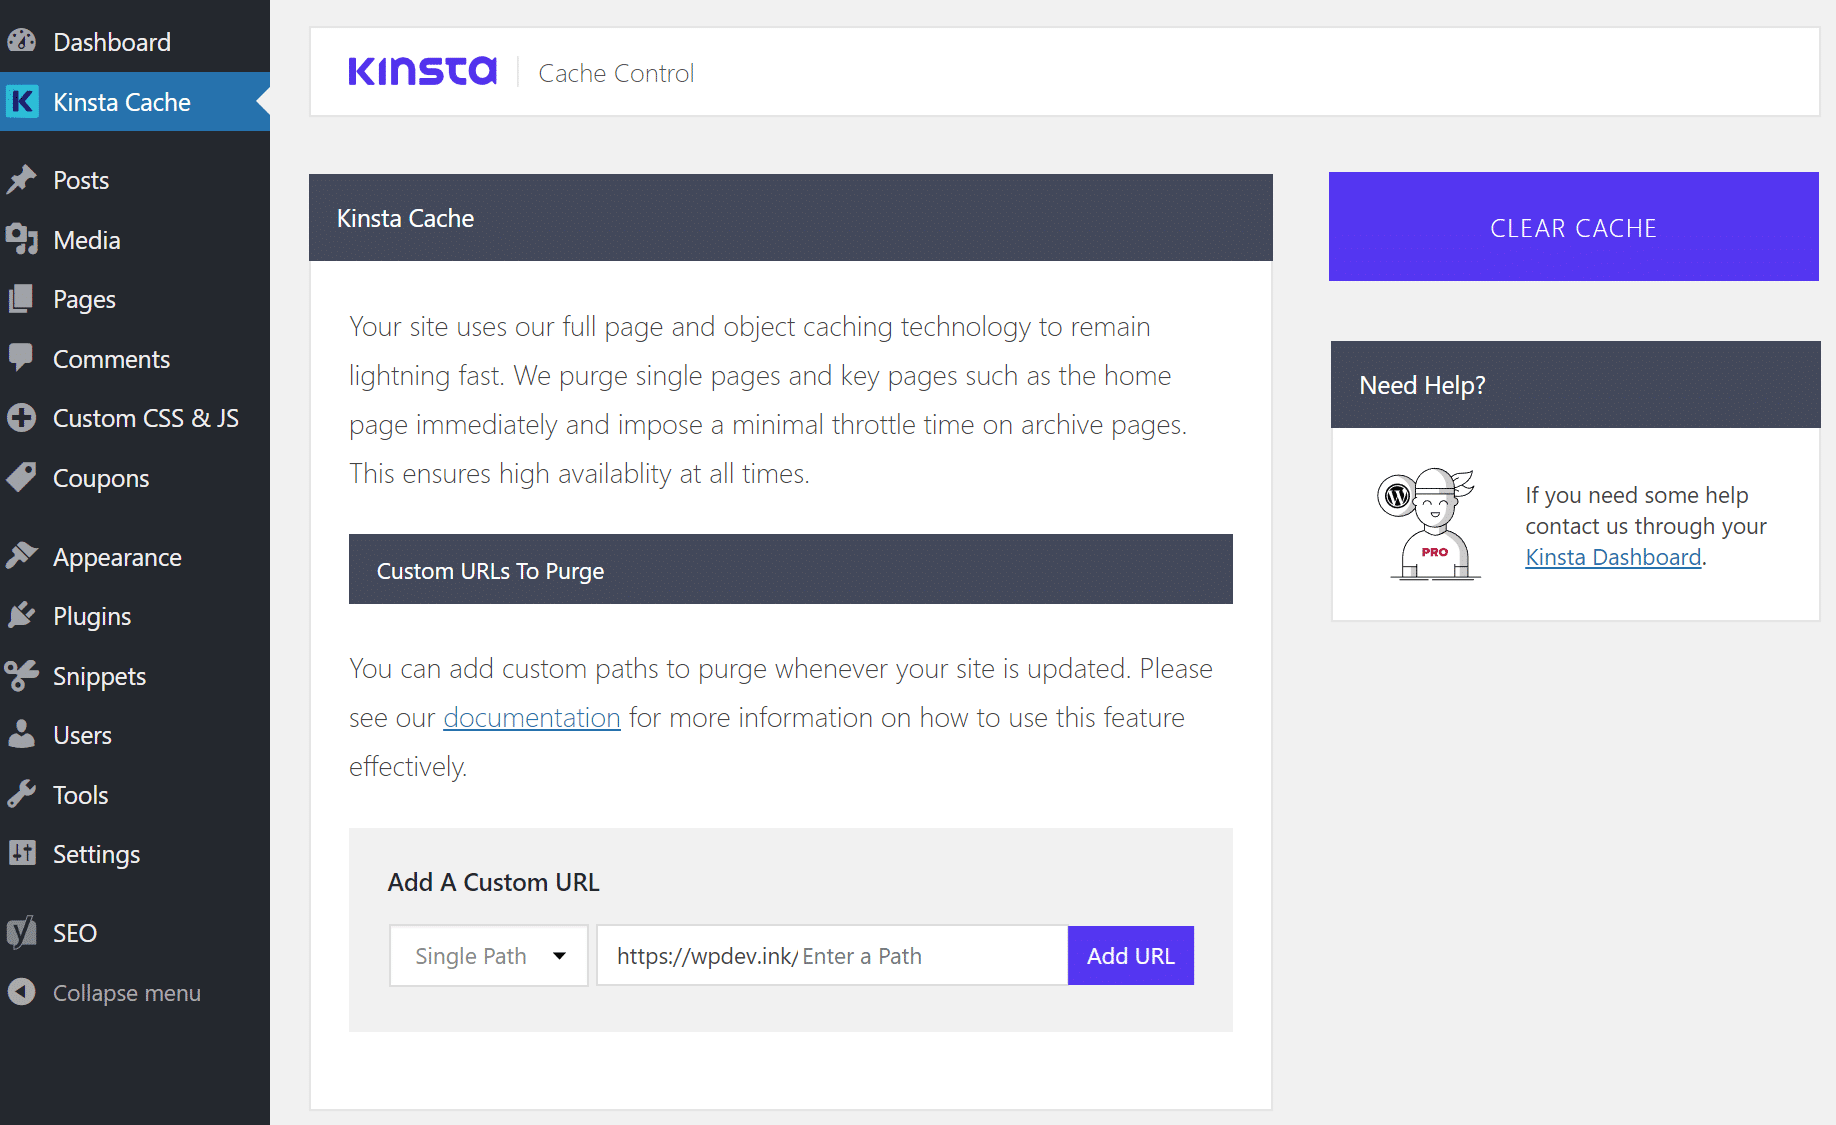
You can also add custom paths to purge whenever your site is updated.
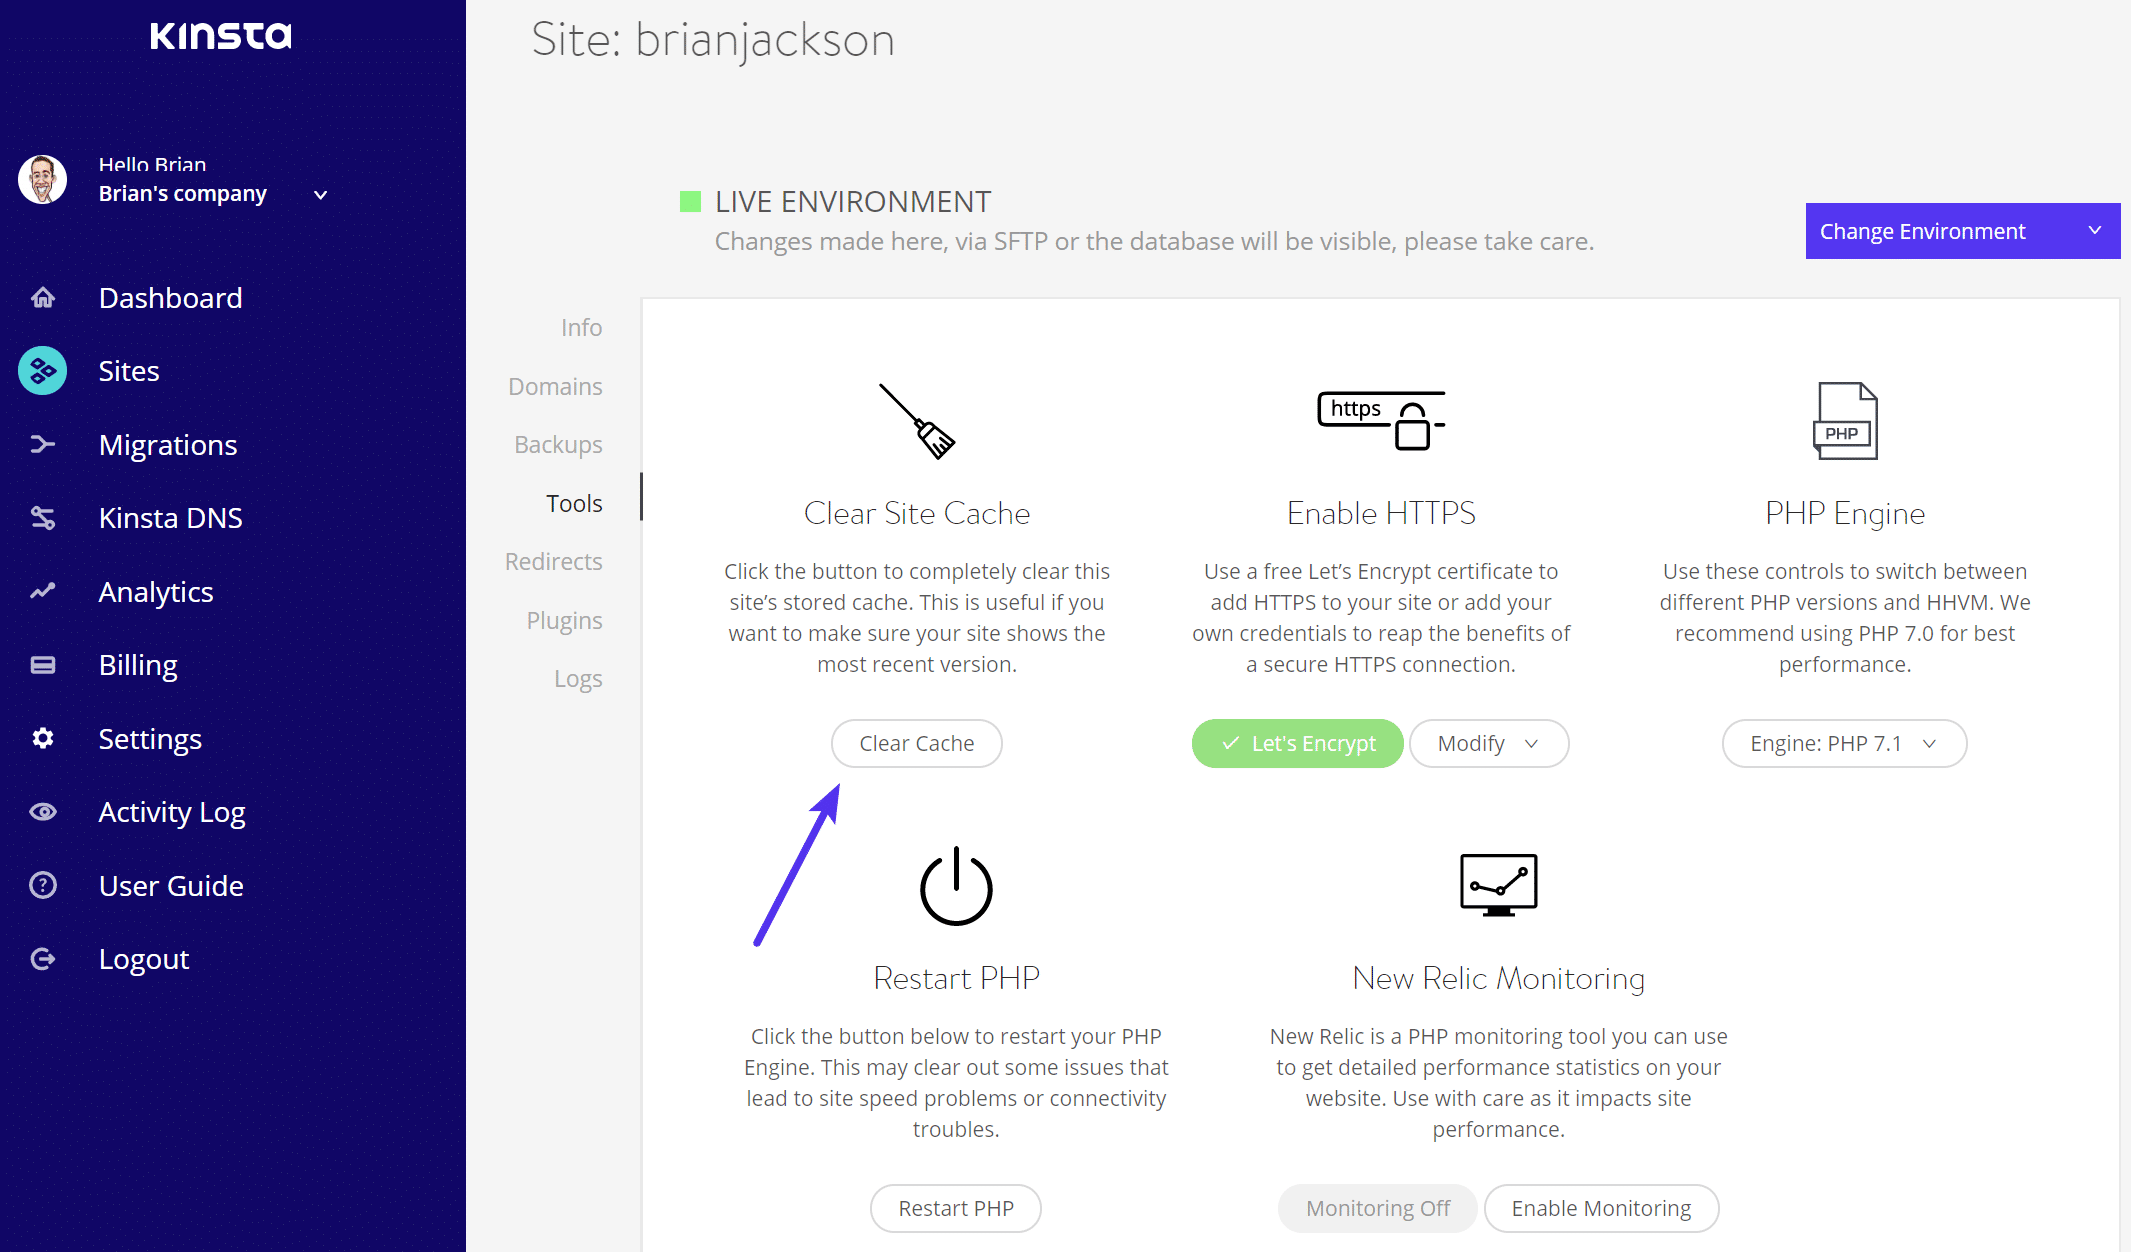
You can also manually clear WordPress cache from within the MyKinsta dashboard. Simply click on your site, click into tools and click on the “Clear Cache” button.
Clear Cache with WPengine
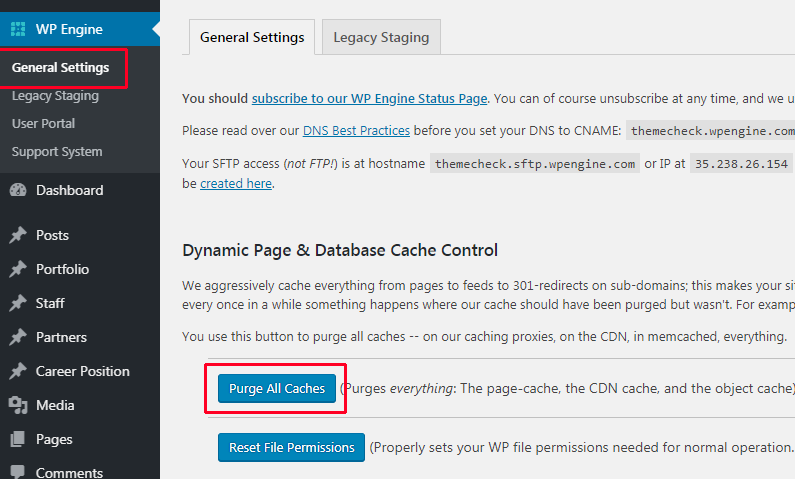
You need to click on the WPEngine menu item in the admin bar and then under ‘General’ settings click on purge all caches button.
Conclusion
Until you are done creating / modifying your website you shouldn’t use a cache plugin.
Cache plugins may be hard to configure correctly depending the theme you are using, this is why we recommend to use Kinsta if you are not familiar with WordPress and want a fast and stable website.
If you liked this article you can follow us on Twitter and Facebook.


